like with quilts, when I'm doing something as free form as this blue necklace is, part of the challenge is knowing when to stop
after every addition on each side I ask the question "are we done?"
yesterday the answer was yes
so here is the finished necklace -- and I'm really pleased with how it looks
and even though it appears very spiny, it is actually very soft and comfortable around the neck - the result largely of using that flexible right angle weave tube as the base
nice
this is the beginning of a piece I'm working on as part of the Etsy Bead Weaver Team's September Challenge
(I know, yellow ink on white is pretty hard to see - I'll probably be hating myself for that decision when I get into the beading!)
and today's pictures are the result of a enormous work around -- take picture with camera, download picture from camera through laptop computer to USB drive, take USB drive to desk top computer and use software to edit/size/etc., take USB drive back to laptop computer to access the internet -- time consuming, but for now it's what I've got -- and about now I'm really glad I hadn't gotten around to getting rid of the desktop -- think I'll be hanging on to it a bit longer!
geesh!!
Esmerldas Studio blog is the place where I talk about all of the currently ongoing projects.
Sunday, July 31, 2011
Saturday, July 30, 2011
stamping in the redwoods
ok, it's not quite stomping at the savoy, but hey, we do what we can
yesterday afternoon I drug out the materials and tools and cut three redwood stamps
I decided that more than one size and shape would give a more realistic look to the project
these came together really quickly, and I'm pleased with the way they look
one of the things that didn't occur to me until after I had finished cutting is that I'll be use these to stamp right on the quilt and on some tear away stabilizer so I can do some "free floating" pieces that will be added like the aspen leaves later
I'm a big fan of back to school sales
every year when they are on I go and buy the supplies that I will need to have for office and creative projects for the next year
this year's haul included ball point pens in black and red, plastic sheet protectors and a stack of letter size legal pads that I use for lists, drawing designs, writing letters, etc., etc
that stack of legal pads was the best deal -- less that 50 cents each because they were on a close out sale -- nice
and I'm now ready to organize another 56 quarts of fabric
heh - I love the way these kind of tubs are sized by a liquid measure -- like I'm going to pour anything liquid into a container of this shape!
at any rate, I'm on a "get it organized, clean it up" kick in the studio -- not to the point that I can't continue to work in there until its done, but just in an effort to make things more convenient for me and not quite so messy looking in case I want to have someone visit
the garden continues to provide inspiration for future work
one of the onion plants had hidden its bloom tip in among the potatoes long enough to get to to this stage
I pinched it off and brought it into the house for the photo session -- and when I was done it went into the bin for composting
I'm beginning to think about using some of these photos as the beginning of a small quilted piece that I could submit for next year's SAQA auction
and from the "Now What The ?!" file, this blog is being written on the DH's computer as this morning mine got to the "Windows is Starting Up" screen and hung there -- needless to say I'm plenty annoyed, and extremely delighted that I learned from the last painful computer episode to store all of my data on an external hard drive, so I can be up and running from a replacement on pretty quickly -- obviously I'll be having another discussion with the family Computer Doc --
NUTS!
Friday, July 29, 2011
seeing the forest from a different vantage point
last night I stitched down the last of the aspen leaves
the entire time I've worked on this piece I've never taken a picture of it other than laying it on the floor and taking "spot shots", which of course means every photo is distorted from reality
this morning it occurred to me that I should make use of the curtain rod in my studio to get a better shot of the entire piece
so here we have it
and I am amazed
it looks so -- real
when I was going through the folder I discovered about half a dozen leaves that didn't get pinned on before the great stitch in, and I probably will stitch those on, but other wise the aspens are done until I put on the 61 free floating ones
so now it's time to think redwoods
I've been thinking about how to do the back layer of color on these that will be the equivalent of the layer on the aspen side that I did by stamping with bubble wrap
last night the DH suggested I cut a stamp and use it to create some of that background , so today I plan to sit down with my stamp cutting supplies and cut a couple of different stamps to do that background with -- we'll see how that all goes
the quilting on the Hawaii piece is going well
I've done the quilting in that white band that runs all the way across the piece and in the blue and purple areas right below it
so far I'm pretty pleased with the way this piece is going
and it is moving along pretty quickly too
work on the blue necklace continues
yesterday I started working on the narrower tube on one end, where I'm using a smaller embellishment
today I'm going to go through my bead stash again and look for some more pieces that I can use in the center section to add some more -- there are still some places where I can see the base tube and I'd like to change that, but I'll need to search for some usable embellishment pieces
progress is also being made on the Christmas knitting project -- last night I finished the body of the sweater and bound off the ribbing, then started on one of the sleeves -- yippee!!
if you've been reading along here for a while, you may remember this project
after considerable experimentation with techniques I have decided that my idea of being able to "paint" the sunset sky behind the animals is not going to work
along the way I've had plenty of time to think about where I really want to do with this, and I'm starting to think that in a mat isn't it -- at least not in the traditional sense -- and I don't think it will end up being rectangular either -- I'm thinking about running the tree branches up and out
obviously this is still morphing
time to go get some breakfast and make a quick trip to the store for a couple of things then its back into the studio!
Thursday, July 28, 2011
waiting for the fat envelope
yesterday morning we took these five quilts downtown to the main branch of our library district
(we've lived here for almost 10 years and I had never been in that library -- there has never been a need for me to go there because our library district has it's card catalog available on line and you can request things which are then sent to your nearest branch library -- it's a very cool thing)
anyway, the pieces were there for the annual jurying -- we took the pieces in and spread them out on tables for the process (which made me wonder why they put us through the whole business of having them "hanging ready") -- later in the day we went back to pick them up
while we were in the library we had the chance to see the work that was currently on display -- which just happened to be quilts -- it was nice to get a close up view of where the pieces might be hung and the way they hang them
so now the long wait begins -- their process takes up to 2 weeks and they send the notifications by snail mail -- I'll be stalking the mail man
the embellishment has begun on the blue necklace
using a variety of odds and ends of beads I'm wrapping the outside of that tube with a second layer of decorative beads
this layer is running around the tube and the next layer with go from end to end with more things -- probably bugle beads with a tiny seed bead at the tip
this method of embellishment is relatively easy to do on a right angle weave tube
the first of the zucchini has been picked!
this will be going into a salad (along with some lettuce out of the garden)
yum
time to get busy --- lots to do
Wednesday, July 27, 2011
blue tubing
not to be confused with river tubing of course
I finished zipping the rest of the tube and got exactly what I was hoping for -- a flexible tube that gets wider at the center
so now its ready for the embellishment I have planned for it
and there is another project in the chute behind this one that I started pulling out the beads for yesterday
meantime, today we will be taking 5 of the art quilts to the main branch of the local library for the once a year jurying to do a solo exhibit in one of the library branches in the next year
and then there will be waiting -- for as long as two weeks -- to find out if they made the cut
here's hoping
Tuesday, July 26, 2011
zipping
zipping up the side of the bead tube that is
you can see that the end of the tube at the top has been rolled and stitched together
I'm hoping to have this part done today so I can get on to the next part -- the embellishing
on Etsy I belong to the Bead Weavers Team, and the challenge that has been issued for September struck me as something I would have fun doing, so I'll be working on collecting the materials for that project
work at the sewing machine continues -- I found some elastic and finished that first pair of pants yesterday, so now I can cut out the other pair
and yes, we're in the chugging along stage in the two quilt projects
just another day in the studio!
Monday, July 25, 2011
male and female - the botany lesson
the other day I was talking to my daughter about being able to tell the difference between the male and female zucchini blooms
for quite some time I've been able to tell them apart by the shape of the stalk that supports them -- the male blooms are on long narrow stalks while the female ones are on shorter stalks that look like miniature zucchini
it wasn't until I was out in the garden to take pictures that I noticed the other way to tell them apart
the picture at the top is the male bloom - with one single stigma in the center
the picture at the bottom is the female bloom - with many stigma in the center
cool -- gardening is an ongoing botany lesson!
it is also a continual source of inspiration for art work
yesterday I spent some time at the sewing machine doing something I hardly ever do -- making an article of clothing for me
when I bought the cute fabric that I made Mr. Cute's sun hat out of, I also got fabrics to make me two pair of capri length summer weight pants
I'm finally getting around to that sewing
in fact, these are nearly done -- and would be finished except I don't have any elastic for them
so as soon as I get that these will get finished and I make the other pair
there are now 138 aspen leaves stitched on to the trees project -- the end is in sight (provided I don't decide it needs more, of course)
and I have actually started quilting on the Hawaii piece --
in this picture you can see all of the safety pins I used to pin the backing, batting and top together
because I quilt in my lap without benefit of a frame I usually begin quilting on a piece in the center and work outward so any ripples or bumps get smoothed out to the edges as I work and the entire piece is even when I get finished
on this piece I decided to begin by quilting swirls in that white strip that runs all the way across the piece just below the center line
I'm planning to do that kind of "texture" quilting on the entire piece -- swirls in the white caps, undulating "waves" in the sea sections, etc.
it will probably take a while to get it finished, but so far I'm really pleased
and this piece already qualifies for the "did I do that" feeling that usually tells me it is well done
the results for the Hoffman 2011 challenge have been posted on their website
this piece, which was my entry, did not make the cut
in looking at it with as unbiased an eye as I am able, I would say that it has no central focal point and there is not enough contrast in the coloring
we will not speak of it again
time to have breakfast and finish the laundry
for quite some time I've been able to tell them apart by the shape of the stalk that supports them -- the male blooms are on long narrow stalks while the female ones are on shorter stalks that look like miniature zucchini
it wasn't until I was out in the garden to take pictures that I noticed the other way to tell them apart
the picture at the top is the male bloom - with one single stigma in the center
the picture at the bottom is the female bloom - with many stigma in the center
cool -- gardening is an ongoing botany lesson!
it is also a continual source of inspiration for art work
yesterday I spent some time at the sewing machine doing something I hardly ever do -- making an article of clothing for me
when I bought the cute fabric that I made Mr. Cute's sun hat out of, I also got fabrics to make me two pair of capri length summer weight pants
I'm finally getting around to that sewing
in fact, these are nearly done -- and would be finished except I don't have any elastic for them
so as soon as I get that these will get finished and I make the other pair
there are now 138 aspen leaves stitched on to the trees project -- the end is in sight (provided I don't decide it needs more, of course)
and I have actually started quilting on the Hawaii piece --
in this picture you can see all of the safety pins I used to pin the backing, batting and top together
because I quilt in my lap without benefit of a frame I usually begin quilting on a piece in the center and work outward so any ripples or bumps get smoothed out to the edges as I work and the entire piece is even when I get finished
on this piece I decided to begin by quilting swirls in that white strip that runs all the way across the piece just below the center line
I'm planning to do that kind of "texture" quilting on the entire piece -- swirls in the white caps, undulating "waves" in the sea sections, etc.
it will probably take a while to get it finished, but so far I'm really pleased
and this piece already qualifies for the "did I do that" feeling that usually tells me it is well done
the results for the Hoffman 2011 challenge have been posted on their website
this piece, which was my entry, did not make the cut
in looking at it with as unbiased an eye as I am able, I would say that it has no central focal point and there is not enough contrast in the coloring
we will not speak of it again
time to have breakfast and finish the laundry
Sunday, July 24, 2011
beading, garden update and more stinkin' cuteness
a few days ago I worked up that little "tornado" bead as an experiment for a necklace idea I had
only problem was it was so rigid that I didn't think it would ever lay comfortably around the neck, and I wasn't sure I could do the embellishment around it I had in mind either because it was so stiff
yesterday I took the tornado apart and did this strip of right angle weave (RAW)
the advantage of RAW is that it is extremely flexible even when you use different sizes of beads as I did here -- I wanted a strip that was bigger in the center then tapered out at the ends, which this will do just great when it is finished
so, this new approach is a "go" -- I'll be working up the sides to make it the length I need it to be then "zipping" up the flat piece to create a tube that I can do the embellishing on
the garden is doing well -- in the pictures we have bell peppers, Hungarian banana wax peppers, Anaheim chilies and a Roma tomato that is not only really loaded with tomatoes but they are the oddest shape I've ever seen
those tomatoes, as well as another plant that we know is a Heritage tomato were purchased at a nursery near where our daughter lives, and the plants have been amazing -- so much more healthy than those that come from the big box hardware store -- its worth the little extra amount they cost
I wanted to get a picture of the blooms on the zucchini plant while there were both male and female blooms open, but the bees beat me to them, so now I'll have to wait for the next time there is a female bloom open -- with zucchini that won't be long! The up side of the bees beating me to it is I'll have little fresh, tender zucchini to eat very soon
a couple of weeks ago I was talking here about making a second sun hat for Mr. Cute
I stuffed it into a padded envelope (affectionately known as a "squishy" by our clan) and mailed it off
and yesterday his mama sent me this picture of him modelling it
oh the stinkin' cuteness!
love the picture, he is so adorable
Saturday, July 23, 2011
Mission accomplished
or very nearly so
the binding is all done and the "free flying" butterflies are all attached (close up of one of them shown)
now I just have to put the label on it -- which means I need to settle on a title for it -- and I'm open to suggestions on that
I thought about titling it "summer postcard" but that was based on the original idea I had to try and make it a piece that could be hung showing either side, which didn't work out
so now I'm back to "what do I call it?"
in the end, having to put a binding on it wasn't so bad -- it doesn't stick out too much, and while it is different from the original plan it looks good
now that this is finished I need to spend some time getting the pieces ready for the trip to the library on Wednesday for the jurying -- that should be a challenge
and from the "I was green before it was cool" file
this photo showed up in an email that I received this morning
this is a trivet to set a hot dish on the table
it's made by crocheting around bottle caps
back when I was in high school and spent most of my summers between reading the thickest historical fiction I could get at the library and making some kind of fiber craft I made a couple of these -- including one that looked like a bunch of grapes
hey, the materials were cheap (bottle caps were FREE! just save them from the Duffy's drink bottles or the RCs), and it was a useful project
seems this idea has returned!
if you'd like to see the instructions as they have been "revised" you can use this link
amazing
the binding is all done and the "free flying" butterflies are all attached (close up of one of them shown)
now I just have to put the label on it -- which means I need to settle on a title for it -- and I'm open to suggestions on that
I thought about titling it "summer postcard" but that was based on the original idea I had to try and make it a piece that could be hung showing either side, which didn't work out
so now I'm back to "what do I call it?"
in the end, having to put a binding on it wasn't so bad -- it doesn't stick out too much, and while it is different from the original plan it looks good
now that this is finished I need to spend some time getting the pieces ready for the trip to the library on Wednesday for the jurying -- that should be a challenge
and from the "I was green before it was cool" file
this photo showed up in an email that I received this morning
this is a trivet to set a hot dish on the table
it's made by crocheting around bottle caps
back when I was in high school and spent most of my summers between reading the thickest historical fiction I could get at the library and making some kind of fiber craft I made a couple of these -- including one that looked like a bunch of grapes
hey, the materials were cheap (bottle caps were FREE! just save them from the Duffy's drink bottles or the RCs), and it was a useful project
seems this idea has returned!
if you'd like to see the instructions as they have been "revised" you can use this link
amazing
Friday, July 22, 2011
the design opportunities keep coming
while I had dreaded doing the squaring that part of the project went really well
I'm gaining confidence for doing that part thanks to having that "re purposed" carpenter's square to use
the problems began after that when I discovered that even though this piece had been at least two inches bigger than the required size when I started quilting, and it had been "aggressively pressed", it was now an inch too small one direction and and inch and a half on the other
so much for the idea of simply facing it so the design would look like it just runs off the edge of the quilt
no, I was going to have to do something that would "expand" the piece just a little bit
and I didn't have a lot of choices for what fabric to use either, because I needed to use only the fabrics from the challenge packet
after considerable fussing with pencil and paper, measuring and remeasuring and testing with some scrap fabric I finally cut into the last piece of the challenge fabric and bound the top and bottom edges
this added the necessary amount to those edges and this direction it now is the right size
today I plan to do the binding on the sides -- which will be a bit wider
yup, the problem solving isn't over until the last stitch is done!
I'm gaining confidence for doing that part thanks to having that "re purposed" carpenter's square to use
the problems began after that when I discovered that even though this piece had been at least two inches bigger than the required size when I started quilting, and it had been "aggressively pressed", it was now an inch too small one direction and and inch and a half on the other
so much for the idea of simply facing it so the design would look like it just runs off the edge of the quilt
no, I was going to have to do something that would "expand" the piece just a little bit
and I didn't have a lot of choices for what fabric to use either, because I needed to use only the fabrics from the challenge packet
after considerable fussing with pencil and paper, measuring and remeasuring and testing with some scrap fabric I finally cut into the last piece of the challenge fabric and bound the top and bottom edges
this added the necessary amount to those edges and this direction it now is the right size
today I plan to do the binding on the sides -- which will be a bit wider
yup, the problem solving isn't over until the last stitch is done!
Thursday, July 21, 2011
another charity quilt complete and cone flower quilting
and here is the second charity quilt top for this month
after I finished this one the DH said "that print would have been good with red or yellow too"
uh, yeah, but blue and green were the fabrics in the stash, so there you have it
it's nice to have these done so far in advance of the next quilt guild meeting (which isn't until August)
the quilting on the cone flower is finished
and after I did the last of the quilting last night I trimmed away all of the batting that was hanging out around the edges so all that is visible is the backing around the edges
today I'll lay it out on the table and do the hardest part of the whole process -- cut it square in preparation for putting on the facing, the sleeve and the label
oh yes, then I'll add the butterflies that will only be attached in the center of their bodies
well ahead of the deadline on this piece too -- Yippee!
I've been fiddling with some beads for a new piece of jewelry -- maybe
right now this looks like a mini tornado
my biggest question will be rather or not I can actually do any embellishment over this -- which I won't know until I get quite a bit more beading finished
before I wrote this today the front lawn had been mowed and the garden weeded -- the outdoor work finished early before the heat gets us
time now for some breakfast then back into the studio to do some work
Wednesday, July 20, 2011
one top done, one to go
first of the two tops to be finished
today I hope to get the green one finished too
right after the back yard gets mowed
today I should get the rest of the quilting finished on the cone flower -- so perhaps tomorrow there will be pictures of that
meantime just chugging along, trying to endure the heat and get projects done
onward
today I hope to get the green one finished too
right after the back yard gets mowed
today I should get the rest of the quilting finished on the cone flower -- so perhaps tomorrow there will be pictures of that
meantime just chugging along, trying to endure the heat and get projects done
onward
Tuesday, July 19, 2011
therapy continues
once I got those charity quilt tops started I figure I might as well get them finished
so yesterday I sliced up the pieces and stitched up the centers of these two
the plan for today is to cut the outside borders and get them stitched on -- then I'll have the July charity quilt tops all done --- WHOOT!
meantime, yesterday afternoon I spent some time browsing through a pile of old magazines and had an idea for a new piece of jewelry (remember I said I have more pieces that need to be reworked, but I wanted to do something NEW first) -- spent about an hour pulling out beads (and other stuff) that I can use for this project, so sometime today I'll start fiddling with the idea
there are now over 100 leaves stitched on to the trees and I'm getting closer to the top edge of the quilt -- and now starting to think about the next step -- and wondering if there will be enough of the aspen leaves on there or should I cut and stitch over 100 more -- when I'm done stitching I'll take a picture and try to decide that
quilting on the cone flower is moving along really well - I have one more of the yellow petals to do and a couple of smaller rust colored ones -- it looks like I will be able to have this one to take with me for the library jury -- nice
time to get to it
Monday, July 18, 2011
charity quilts as therapy
every now and then I have the equivalent of an adult temper tantrum
"No, I don't want to eat what I should!' and "Don't tell me to find an activity I like and get some exercise, there isn't anything I like!"
this happens sometimes when its hot (because I don't feel well in the heat) or when all of the projects I'm working on may be going well, but they're in the "are we there yet" whiny stage
I hit that wall on Saturday, and needed to do something else
so I put on my headset with the MP3 player loaded up with music and spent some time with the rotary cutter and the iron and the sewing machine
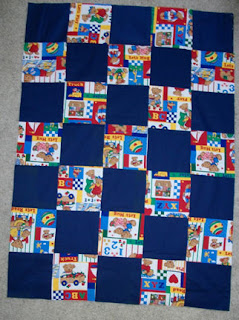
my plan was to create my monthly charity quilt top using stuff that was in the stash -- the print fabric in this was left over from a baby quilt that was recently finished, and I thought there would be enough of it to put in with a solid and make a charity quilt
turns out there was enough for two!
next step is to cut these pieces into 6 1/2 inch strips the other way and stitch again
oh, and after the time with the music and the sewing I was feeling a little less like laying down on the floor and kicking my feet while screaming "no, no, no"
nice therapy
Subscribe to:
Posts (Atom)